Archives

Fall Greens for Comfort

The calendar says it is still fall, however, the temperatures outside say that winter is here.  I love the cooler weather and I love the fall vegetables even more.  Needless to say, I have quite a few favorites for my fall comfort foods.

Today is for Kale.  Curly, leafy, dark-green, wonderful Kale.  Steamed alone or used in soups and stews, kale is a wonderful vegetable to add to your diet.  Filled with vitamin A, vitamin K, vitamin C, calcium, iron, vitamin B-6 and magnesium, and more,  this leafy green adds a powerful nutritional punch to your meals.  I actually crave this veggie on occasion!  So I decided to cook it much like I do spinach, with plenty of garlic and onions and a little olive oil!

Fall2014 168

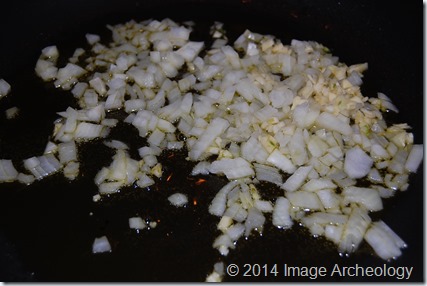
First chop half of a sweet onion in smaller chunks, then finely chop 3 cloves of garlic and sauté over low heat in extra virgin olive oil until the onions sweat and are clear.

Fall2014 169

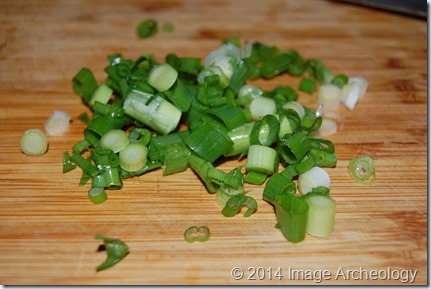
While the onions and garlic sauté, slice up a green onion (also known as scallions) including the white bulb.  Add this to the onion and garlic mixture and sauté together. 

Fall2014 170

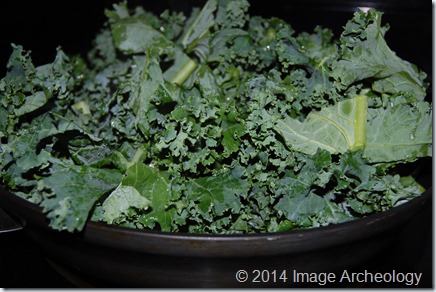
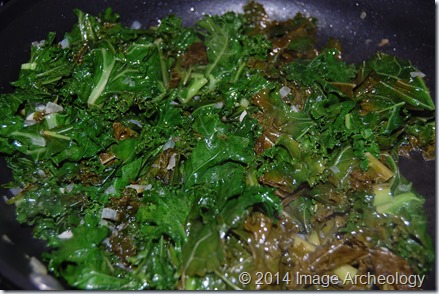
Wash and pat dry a nice bunch of fresh kale.  Roughly chop into smaller pieces, taking care to remove any stems that may be tough.  Pile this into the pan on top of the onions and garlic and toss together.  Watch closely as it begins to wilt.  I take care not to let it get too dark.  Which is why I put about 1/3 cup of water into the greens and put a lid on it briefly.  If you get distracted and let it sit a little too long, they don’t remain a bright green, which is how I prefer my greens. (Note in the photo below….I got distracted by two trouble maker feline children and my greens got a little too dark,) Sprinkle a pinch of kosher salt and freshly ground black pepper to taste.

Fall2014 171

Cyn’s Steamed Kale

1/2 medium sweet onion, finely chopped

3 cloves garlic, finely chopped

1 large bunch kale, washed, pat dry and roughly chopped with stems removed

1 large stalk green onion, finely chopped, including the white bulb

pinch Kosher salt

1/8 tsp. freshly ground black pepper

1/3 c. water

Sauté onion, garlic and green onion in extra virgin olive oil until soft.  Add chopped greens and toss together.  Pour water over greens and let steam in lidded pan until greens begin to turn really bright.  Add pinch kosher salt and black pepper.  Watch closely so greens don’t overcook and turn dark.  Remove from heat and remove lid.  Lightly toss into a serving bowl and enjoy.

It doesn’t matter what anyone says, but nothing beats a nice big bowl of greens on a cold wintery day!  Bon Appetit!
Hummus–From Cyn’s Kitchen

Today I am starving.  Must be the fall nip in the air or the rain.  Whatever it is, I decided it was time to make hummus.  I’d bought the ingredients days ago and each time the pantry door opens, they’re calling my name!

So here goes!  Grab your food processor or blender and get it set up, ready to go.  Now gather your ingredients together: 1-2 cans of garbanzo beans, tahini (sesame paste), garlic, spices, parsley, extra virgin olive oil.

HummusPrep

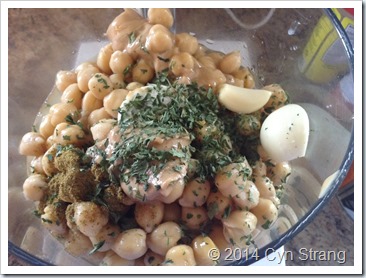
As you can see from the photo above, I just dumped everything in the food processor.  I used just 1 can of garbanzos/chick peas.  I forgot to soak the dry beans overnight, so whatever was in the pantry is what I’m using.  Drain the liquid from the canned beans into a cup or small glass and set aside.  You will want to use some of this later.  You’ll need nice pinch of sea salt, about 1/4 tsp cumin, paprika, 4 tsp tahini, several cloves of garlic, fresh chopped parsley or dried parsley, juice of one lime or lemon and extra virgin olive oil.

Hummus2

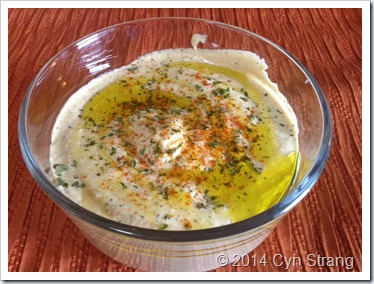
Turn on your food processor and while it’s blending everything together, open the spout and pour your olive oil in.  Leave on until smooth and creamy.  Pour into a bowl, garnish with a few parsley leaves, sprinkle paprika and drizzle a little olive oil.  Here’s the recipe….keep in mind, I do not measure, so measurements are approximate.  Adjust to suit your taste.


Hummus

1 can Bush’s Garbanzo Beans/Chick Peas

4 tsp Tahini (ground sesame paste)

2 large garlic cloves

1 tsp sea salt

1/2 tsp cumin

about 6 tbsp extra virgin olive oil and extra for drizzling

juice of one lime or lemon (I had limes in the kitchen this time)

paprika

coriander or parsley leaves, finely minced or 1/4 tsp dried

Drain the garbanzos/chick peas into a cup or bowl.  Set liquid aside.  Rinse the beans in cold water and place into the food processor.  Add tahini, garlic, sea salt, cumin, lime/lemon juice, and about 1/2 of the bean liquid.  Turn on the food processor and pour the olive oil in it while it runs.

When completely combined and smooth, pour into a serving dish.  Drizzle with extra virgin olive oil, sprinkle paprika and garnish with parsley leaves.  You can also take 3 whole garbanzos/chick peas and arrange in the middle for decoration.

Serve and enjoy as a dip with raw veggies or as a spread for sandwiches on bread or in pita pockets!

Pimento Paroxysm

By definition, paroxysm means any sudden, violent outburst.  In my mind, with summer just around the corner and today being Father’s Day, it’s time to break out the summer dishes and just let the flavors explode all over the palette.  So, given that definition, I think paroxysm works well in my title!

Today I am trying two comfort food dishes that include pimentos but changing it out a little.  Pimentos are just chopped up red peppers that can be pickled and smoked.  I love the flavor they add to dishes and the color just adds a beautiful pop to any dish!  The first dish is a revamping of my favorite summer dish: potato salad.  Who doesn’t love potato salad on a hot day?  There are so many ways to make this dish, but I just kept it simple using what I had in the pantry.  The second dish is: pimento cheese spread.  Another dish that has fifty million different ways of making it, I again chose to keep it simple and the recipe is based on one from a co-worker.


Summer foods 002

First step: peel and chop potatoes.  Probably the least fun part of the whole thing!  I took 5-6 large Idaho potatoes, because that’s what I had in the kitchen!  After peeling and washing them, I put them into a large bowl of water.  It’s been said that soaking them in water will help remove some of the starch.  I guess it’s true, because when I came back a little later to chop them, their texture was very different!

Second step: cook the potatoes.  In a large pot of salted water, boil the potatoes until just softened.  You don’t want to overcook them because the potato salad will be mushy.  Once cooked, drain and rinse the potatoes.  Rinsing them helps to stop the cooking as they will continue to cook until cool.

For the sauce, you will need your favorite mayonnaise or salad dressing.  To keep it vegan, use Veganaise or another similar vegan mayo.  I had some light Miracle Whip on hand and decided to just use that.  Next add some yellow mustard, freshly ground black pepper, healthy pinch of paprika, pimentos, shallots and some Vidalia onion.

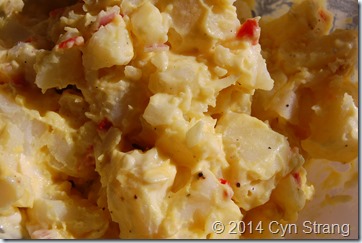
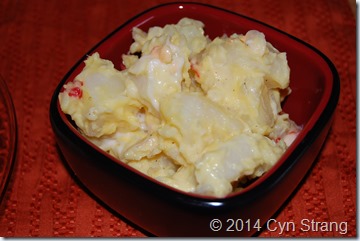
Mixing it all together, chill in the refrigerator for a few hours or overnight so the flavors meld together.  See the recipe below!

Summer foods 003

Cyn’s Pimento Potato Salad

5-6 large Idaho potatoes, peeled and cooked until just tender

1/2 Vidalia onion, diced

1-1/2 purple shallot, diced

2-1/2 tbsp. pimentos

3 tbsp. yellow mustard

3-4 tbsp. salad dressing or mayonnaise

1 tsp paprika

freshly ground black pepper

Peel and soak potatoes in a large bowl of water for about 20-min.  While they are soaking cut the Vidalia onion, purple shallots and place in a bowl together with all the other ingredients.

One the potatoes are chopped, cook until just tender in a large pot of boiling salted water.  Drain and rinse to slow the cooking process.  Toss altogether and chill in the refrigerator for at least an hour or overnight so the flavors will meld.

Summer foods 010

*******************************************************

Now for the second dish!  I love pimento spread, but sometimes the store-bought has so many extra ingredients in it and while I like cream cheese, using it in pimento spread makes the spread so much heavier, in my opinion.

This recipe was inspired by a co-worker who brought in her pimento spread for a birthday party luncheon that we had recently.  I basically followed what she told me, except for the choice of cheese.  She uses Velveeta process cheese and I chose sharp cheddar.

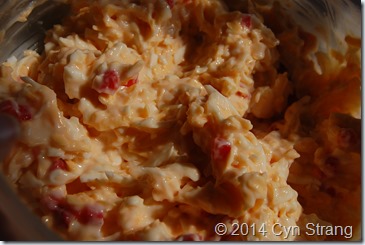
The end result is basically the same = creamy, light, flavorful.  Perfect.

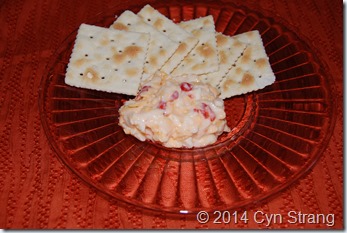
Summer foods 006

Doesn’t that close up photo just make you want to dig in?!? 

Here’s the recipe:

Cyn’s Pimento Cheese Spread

1 cup freshly grated extra sharp cheddar cheese

2-3 tbsp. pimentos, including the juice from the jar

your favorite mayonnaise or salad dressing

(I added some freshly grated white Mexican melting cheese that I had because there was just a tiny bit of it left.  I think it came to about 1/3 cup or less)

Mix all together in a large bowl until well combined and creamy.  You may have to add more mayonnaise or salad dressing until it’s the right consistency.  Chill for at least an hour to allow the mixture to set.

Serve on bread or crackers or use as a dip with your favorite dipping chips.

Summer foods 009


Bon Appetite!

General Tso’s Tofu

There is a little hole in the wall in town that makes the absolute best General Tso’s tofu.  They serve it with broccoli and it’s been a very long time since I’ve even made it to that side of town to get some!  It has been on my mind for weeks, nagging at me until the craving has gotten so big that I just could not ignore it any longer!  So I started searching for a recipe to make General Tso’s Tofu.

After looking at countless recipes online and remembering how the dish looked from my local restaurant, I finally found one that I could use!  I had most of the ingredients and figured tweaking it a little based on what I have on hand would be fine.  After all, if it tastes good, that’s all that matters, right?

First step: open the package of Organic, non-GMO extra firm tofu and drain.  Wrap it in a towel and place a plate on top and bottom to press out more water/liquid and let sit for a little while until it isn’t so wet.

Spring 2014 Epcurian delights 150

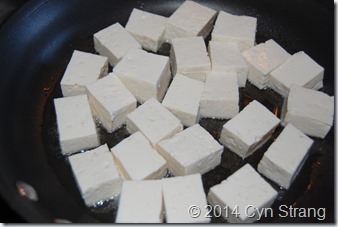
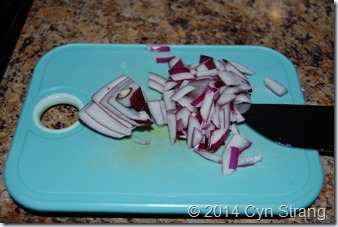
I cut mine into square, little cubes and put them in the pan to brown the edges a little.  While the tofu browns, dice up half of a red onion.

Spring 2014 Epcurian delights 151

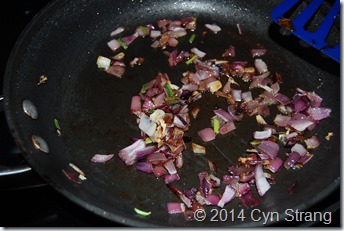
Remove the browned tofu cubes from your pan and sauté the diced red onion.  I used about a tablespoon of extra virgin olive oil for the tofu and the onions.  I also put 3 cloves of garlic through the press and chopped some onion greens to the sauté.

Spring 2014 Epcurian delights 152

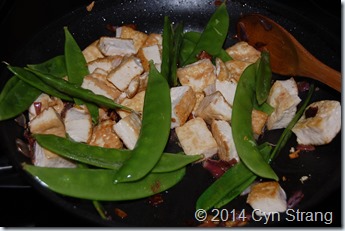
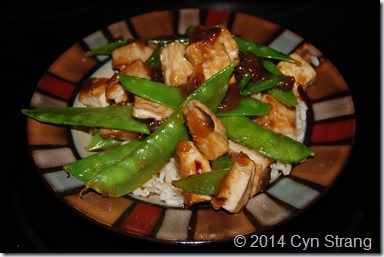
To change things up a bit, throw in some snow peas with the sautéed onions and add the browned tofu.

Spring 2014 Epcurian delights 153

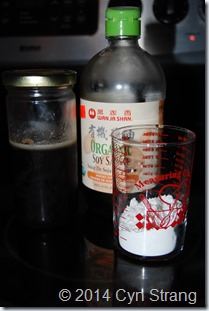
Now for the sweet, tangy sauce that makes this dish so delicious.  Gather together the organic soy sauce, something a little sweet and the corn starch for thickening.  My sweet was some homemade syrup that I had leftover from a Sunday morning brunch recently.

Spring 2014 Epcurian delights 154

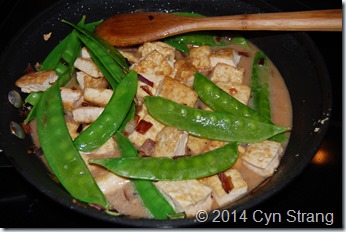
Add 3 tbsp sweet and 3 tbsp organic soy sauce to the pan.  In a small measuring cup, add 3 tablespoons of corn starch and 6-8 tablespoons water and mix together until smooth without lumps.  Add to the pan and quickly toss the tofu mixture so that it is evenly coated.

Spring 2014 Epcurian delights 155

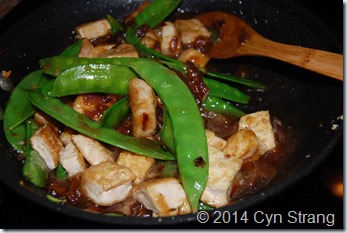
As the liquid heats up, it will thicken.  Remove from the heat once it is thick and the tofu mixture is coated well.

Spring 2014 Epcurian delights 156

Below is the actual recipe courtesy of Food.com.  Someday, when all the ingredients are in my pantry, I may try this again!

Spring 2014 Epcurian delights 158

General Tso’s Sauce

3 tbsp soy sauce

3 tbsp sugar

2 tbsp rice wine

1 1/2 tbsp rice wine vinegar

1 tbsp chili paste

1 1/2 tsp cornstarch

Mix all ingredients in a sauté pan.  Cook at medium temperature until thickened, stirring occasionally.

While I left out some of the ingredients in this particular recipe, it turned out really nice and if you don’t like spicy, leaving out the chili paste won’t matter!  Snow peas and all, this was probably one of my better lunches…ever.  And I thoroughly enjoyed every bite.

Until next time… Bon Appetit!

Mediterranean Lentils and Rice

Fall brings on cooler weather and with that comes a craving for warmer foods.  Warmer foods meaning soups, stews, casseroles and all those wonderful fall squashes, greens and of course, the year-round staple, legumes.

Lentils are one of my favorite foods.  Growing up, we ate it made into a thick stewp: too thick for soup, but not quite a stew.  We ate it on rice, we ate it as a meat substitute in a casserole.  It is a very versatile legume and one that I consider to be quite tasty!

Packed full of folate, fiber, iron, vitamin B1, potassium and protein, these are just some of the benefits we receive from eating lentils.  Being a cancer survivor, I like to add additional spices and seasonings to boost their value even more.

This week I went with the Mediterranean style that I love so much.  I hope that you’ll enjoy it as much as I do!  Remember, I do not measure so all measurements are approximate.  You will have to add/detract to adjust for your taste!  Enjoy!!!

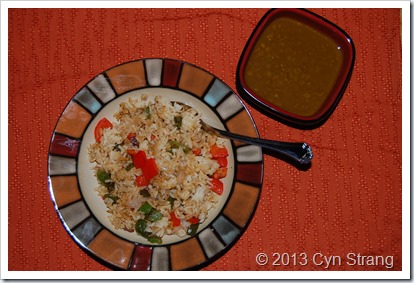
Fall 2013 070

Vegetable Rice

Into the rice cooker went about 2 cups of white jasmine and brown jasmine long grain rice with enough water to cover the rice plus two fingers over.  I find that mixing the rice together helps my picky eaters enjoy the healthier brown rice more. 

Gather together the veggies for your rice.  I grabbed whatever was in the refrigerator:

1/4 red sweet bell pepper, diced

1/4 green sweet bell pepper, diced

2 large shallots, peeled and sliced thin, separate the rings

1 medium red onion, diced small

1-2 garlic cloves, finely chopped or put through garlic press

1 small carrot, peeled, sliced and cut into small squares

1 stalk celery, diced small (optional)

Pinch Sea salt or kosher salt

Freshly ground black pepper

1/4 tsp. onion powder

1/4 tsp. garlic powder

1 handful parsley chopped fine or big pinch dried, rubbed through your fingers

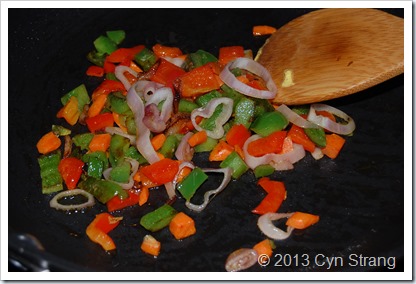
Sauté in extra virgin olive oil until the carrots and celery soften a little.  Add rice and toss until well coated with veggies and olive oil.  Add seasonings: salt, pepper, onion powder, garlic powder.  Warm thoroughly and add parsley.

Fall 2013 065

Mediterranean Lentils

1 large shallot, finely chopped

1-2 garlic cloves, finely chopped

1/2 tsp turmeric

1/4 tsp Celtic Sea Salt

1/4 tsp garlic powder

1/4 tsp onion powder

1 tbsp Worcestershire sauce or Bragg’s Liquid Aminos

1/4 cup to 1/2 cup lentils

Sauté shallots, garlic and spices together until shallots are soft and clear.  Add rinsed and drained lentils and enough water to cover the lentils plus about an inch above.

Let cook until the lentils are soft, add water if too thick.  You may need to adjust the seasonings if you add a lot of water.

Once done, serve up and enjoy! 

Red Quinoa Summer Salad

Quinoa has been around for a long time, but I have been slow to try it!  In my part of the world, sometimes it can be hard to find certain items or if it is to be found, the selections are quite limited.  I ended up buying this online for several reasons with one being that it is organic.  It is Eden Foods Organic Red Quinoa.  Then because I was uncertain what to do with it, I just let it sit for a while.  A few days to be exact!  Then after talking to a few friends who eat quinoa regularly, I had a better idea of how to use this mystifying grain.

One friend suggested I try it for breakfast.  She eats it every morning like a hot cereal or oatmeal.  So I did on a weekend since this has to cook for a few minutes.  I tried mine with a little molasses.  It was delicious and I did not get hungry for 5 hours!

You can use quinoa to make veggie burgers, vegetarian meatballs and so many other things, but one idea that interested me most was the cold quinoa salad.  I love salad.  Lately, I’ve been eating a salad at least 5-6 times per week.  And for me, the busy week makes me keep everything very simple.  So here is my version of a Quinoa Salad.  I hope you like it!

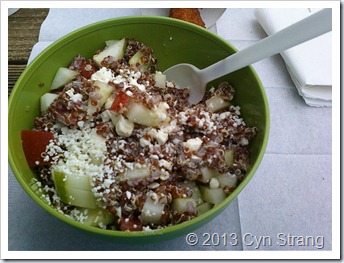
Quinoa Salad


Red Quinoa Summer Salad

Cook the red quinoa according to the directions on the package and then chill for at least 24 hours.

1-2 medium cucumbers, seeded and cut into small chunks

1-medium tomato, seeded and cut into small cubes

1-2 tbsp. feta

Vinaigrette dressing – click here for the recipe

Once the quinoa is thoroughly chilled, toss with cucumbers, tomatoes, and vinaigrette.  Sprinkle feta in and mix well without breaking up the chunks of feta.  Chill for about 30 minutes so the flavors can marinate together.

Serve as a side dish or main meal.

This is such a refreshing salad!  I’m sure it will be reinvented often in my kitchen!

Bon Appetit!
Stuffed Zucchini Boats

This is probably my favorite time of year when it comes to fresh food.  Gardens are in full swing and every weekend weeds must be evicted from them.  Despite the weeds, the bounty that a garden yields can last the rest of the year if planned in advance.

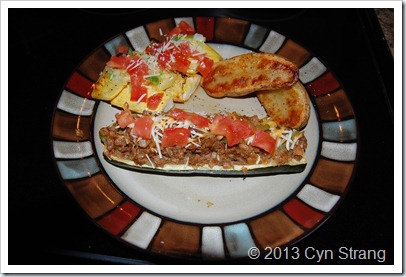
The other day a friend of mine gave me a big bag of zucchini and summer squash from her garden.  And while watching my weekly recordings of cooking shows, I was inspired by Jamie Deen’s zucchini boats.  He stuffed his with Vidalia onions, sausage and tomatoes and cheese.  Mine are a vegetarian version, but all in all, they are so good that it didn’t take long to wolf mine down!

Suffed Zucchini Boats 7-13 001

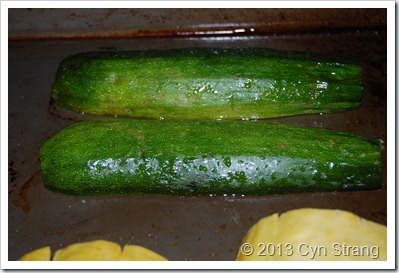
Begin by roasting your zucchini in the oven.  Wash and cut them lengthwise – I snipped of the stem ends as well.  Spray your baking sheet with non-stick spray then drizzle a small amount of extra virgin olive oil.  Lay the zucchini flat down, sprinkle a little grey sea salt over them and roast just until tender.

Suffed Zucchini Boats 7-13 002

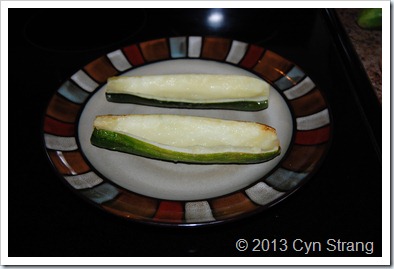
Set the zucchini aside for a few minutes until cool to the touch.  Using a small spoon, gently scrape/scoop out the center until they resemble long boats and set aside.  See the photo above.

While these are cooling, get your stuffing ingredients together.

Suffed Zucchini Boats 7-13 004

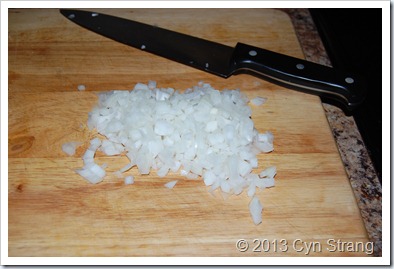
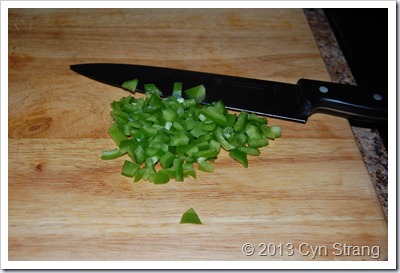
Finely dice a Vidalia onion and sauté in extra virgin olive oil.  One the onions have sweat and turn clear, add the finely diced sweet bell pepper.

Suffed Zucchini Boats 7-13 006

Then add your veggie burger or other choice of meat.  Add a pinch of onion powder, a couple shakes (dashes) of Worcestershire sauce.  Cook until meat is done.

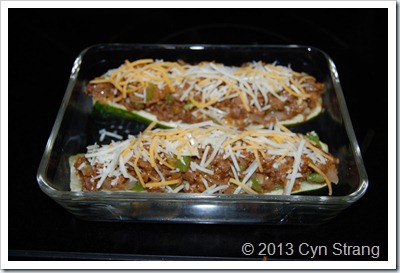
Add a pinch of grated parmesan and cheddar cheeses and a handful of Panko bread crumbs.  Stir together and begin stuffing the zucchini boats.

Suffed Zucchini Boats 7-13 008

Return them to the oven and bake until the cheese is melted and bubbly.

Suffed Zucchini Boats 7-13 011

I served these alongside roasted potato halves and yellow squash that I topped with diced up fresh tomatoes and a little parmesan.  The actual recipe is below.  Keep in mind that the measurements are approximate as I do not measure when I cook.

Stuffed Zucchini Boats

2 Large Zucchini, washed well, ends trimmed and cut lengthwise

1 small Vidalia onion, finely diced

1 small Sweet Bell pepper, finely diced

Choice of ground burger, turkey or veggie burger

(I used about 1/4 cup of veggie burger crumbles)

Grey Sea Salt, to taste

Freshly Ground Black Pepper, to taste

1/4 cup Freshly grated Parmesan Cheese

1/4 cup Freshly grated Cheddar Cheese

A couple dashes of Worcestershire Sauce

Pinch of onion powder

1-2 tbsp Extra virgin olive oil

1/4 cup Panko bread crumbs

Set oven to 350 degrees Fahrenheit. Wash zucchini well, trim off stem ends and cut lengthwise. Spray baking sheet with non-stick spray and drizzle with olive oil.  Lay zucchini face-down and sprinkle lightly with a pinch of grey sea salt.  Roast until just tender.  Remove from the oven and let cool to the touch.  While still warm, using a small spoon, scoop out the centers making boats.  Set aside.

Sauté the onion and green bell pepper in extra virgin olive oil, add meat of choice and cook thoroughly.  Add a handful of Panko bread crumbs, big pinch of grated cheddar and grated parmesan cheeses.  Stir well and let cheese melt a little.  Spoon into zucchini boats and top with a sprinkle of grated parmesan and cheddar cheeses.  Put back in the oven and bake until the cheese melts.

For serving size, you can have one big zucchini half or two small halves per person.

Serve up and enjoy!

Simple Vinaigrette

Once you start making your own salad dressings and marinades, you’ll never want to go back to the store-bought bottled stuff!  At least that is how it is for me.  I’ve been making my own dressings for years and love it.  It’s so easy that anyone can do it!
Start by choosing the type of vinegar that you want to use.  My pantry and fridge usually has a nice variety of vinegars just waiting to be used!

Distilled vinegar – no specific flavor, just the regular vinegar without any pop to it

Raspberry red wine vinegar – pleasant fruity vinegar

Apple Cider vinegar – rich, sweet flavor to the vinegar, mild fruity flavor

Balsamic Vinegar – very strong, bold taste

Vinaigrette

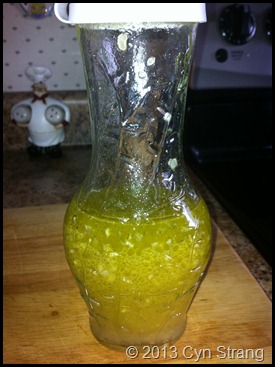
To make it easy on yourself, purchase one of those salad dressing cruets at your local market.  They sit on the shelf by the powdered dressing mixes in the condiment aisle at your grocery store.  On the side of the glass are raised markings showing you just how much vinegar or citrus juice, water and oil to put in your dressing.  Once you get really good at it, you won’t need the markings and can just whip up a dressing in a bowl.  I now use these to store my dressings when I make more than I need for just one salad.

This particular vinaigrette will be paired with a quinoa summer salad.  Keep in mind these measurements are all approximate as I don’t measure exactly.

Cyn’s Vinaigrette

Seasonings:

1-1/2 tsp. minced onion

1 tsp. onion powder

1 tsp. minced garlic or garlic powder

1 tsp kosher salt

1/4 tsp. ground black pepper

big pinch dried parsley

Liquid:

about 1/4 c. apple cider vinegar

about 3-4 tbsp water

about 1/3 c. extra virgin olive oil or your oil of choice

Whisk all together in a dish until well blended or place in a cruet and shake well.  Pour over salad greens and toss.

Enjoy!

Vegetable Tian

What is tian, you ask?  During the summer there are plentiful tomatoes, zucchini, eggplant and many other summer foods in abundance.  Provencal cooking celebrates the traditions of France’s countryside.  And a tian is a layered baked vegetable dish that originated in Provence.  Unlike a gratin, a tian does not include bread crumbs or cheese, which allows the juices of the vegetables to evaporate, thus allowing a deep concentration of the flavors.  Tian is usually served around the holiday Bastille Day during the peak of the summer when all the vegetables are readily available.

While I didn’t have all the ingredients of a traditional tian, I made my own version of it with the vegetables on hand and it was delicious!

Some tian calls eggplant, leeks, zucchini, plum tomatoes but I think you could take any of the summer vegetables that you enjoy and make this dish.  I only had summer squash, zucchini and potatoes on hand, so that along with onions and garlic is what I used.  The simplified recipe that I found follows at the end of this post, however, there are many more authentic recipes that can be found online.

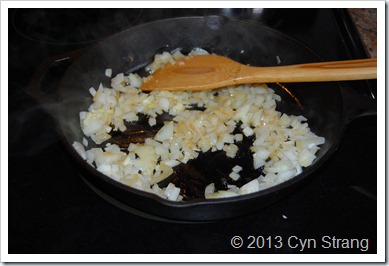
First gather together the vegetables that you will want to use.  Finely chop your onion and sauté in extra virgin olive oil, adding your garlic at the end.  I pushed 2 large cloves of garlic through a press.

Aubrey July 4 2013 visit 006

While your onion and garlic sauté, spray an 8×8″-inch square baking dish with non-stick spray or lightly butter and set aside.

Aubrey July 4 2013 visit 005

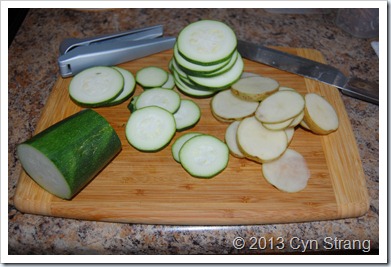
Next, thinly slice all your vegetables, potatoes, whatever it is that you will be using. Since I used zucchini, summer square and potatoes, I sliced them into thin coins.  And since many vitamins and nutrients are found close to the skin, I did not peel my potatoes.  I just scrubbed them really well when washing.

Aubrey July 4 2013 visit 004

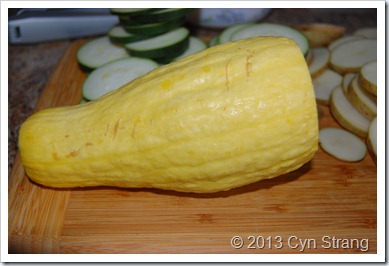
A friend of mine has an overabundance of vegetables in her garden this year and was nice enough to give me some and that is what I used in this dish.  Look at the size of the summer squash! 

Aubrey July 4 2013 visit 009

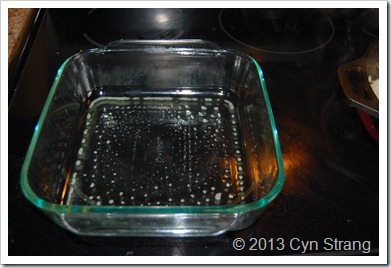
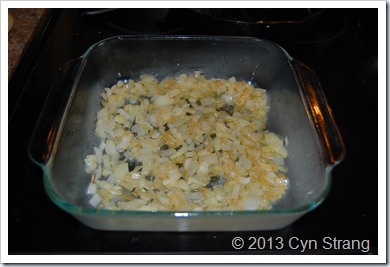
Spread the softened onion and garlic sauté into the bottom of the prepared baking dish.  As you can see, the steam fogged up my baking dish!

Aubrey July 4 2013 visit 008

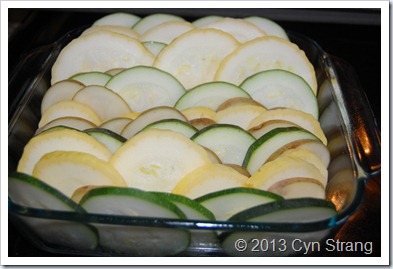
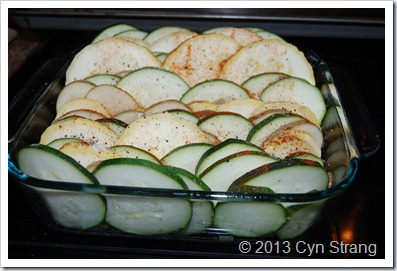
Now take the thinly sliced vegetable coins and neatly stack them, alternating between each veggie per row.  I stacked my vertically for a different look.  If you are using a round dish, layer in fans, working from the center.  Either way, it makes a beautiful display.

Aubrey July 4 2013 visit 010

Sprinkle with sea salt (I use Celtic Gray Sea Salt), freshly ground black pepper and thyme.  Now since I did not have any thyme, I used a little pinch of sage.  And because I like it, a nice sprinkle of paprika.

Aubrey July 4 2013 visit 011


Cover the dish with buttered parchment, or foil if you have that.  Bake in a 400-degree Fahrenheit oven for 30 minutes or until the vegetables are tender.  You can then add a sprinkling of cheese and bread crumbs if you wish, especially if you have kids or picky eaters in the house.  Traditionally this dish does not include it.

photo

Vegetable Tian


1-2 Tbsp extra virgin olive oil

1 medium onion, finely chopped

1 tsp finely minced garlic – or 2 cloves pushed through a garlic press

1 medium zucchini, thinly sliced into coins

1 medium yellow squash, thinly sliced into coins

1 medium potato, thinly sliced into coins

1 medium tomato, thinly sliced

1 sprig of Thyme or 1 tsp dried thyme

sea salt and freshly ground pepper to taste

1 cup shredded cheese – optional

about 2 handfuls Panko bread crumbs – optional

Preheat the oven to 400-degrees Fahrenheit.  Finely dice the onion and mince the garlic.  Sauté both in a skillet with extra virgin olive oil until softened.

While the onion and garlic sautés, thinly slice the rest of your vegetables.

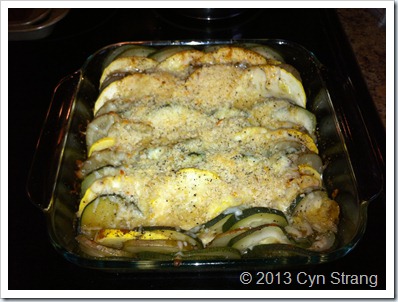
Spray your baking dish and spread the softened onion and garlic in the bottom of the dish.  Arrange the vegetable slices, alternating them, in vertical rows.  Sprinkle generously with sea salt and fresh ground pepper and thyme.  Cover and bake for 30 minutes until tender.  Top with optional cheese and bread crumbs and bake until the cheese is golden brown.

Serve as a delightful side dish with rice or noodles and your choice of main dish.

Enjoy!

Red Quinoa Breakfast

There’s been a lot of talk about it and I’ve seen it used in so many recipes but I had never tried it.  Many of my friends eat it for breakfast, some use it to make side dishes, veggie burgers and such.  Always on the lookout for good, healthy foods, I finally broke down and bought me a bag.


Summer 2013 009

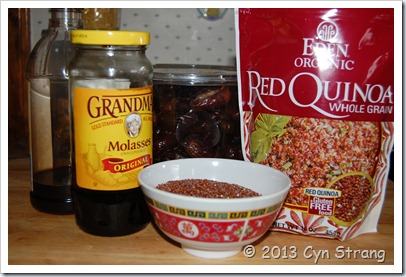
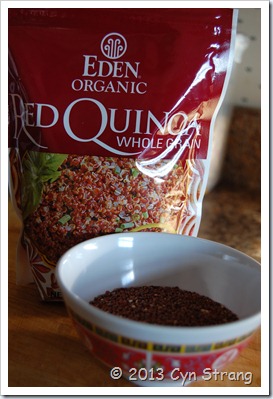
Since my really good friend, Sandra, told me that she eats this for breakfast every day, I decided I would try it for breakfast first.  What better way to start using a grain than to have it to start my day? As you can see from the photo above, the little red grains are super tiny!  And the red quinoa is supposed to have a sweeter flavor to it than regular quinoa.  I wasn’t sure if I should have soaked them or not, but I decided to just follow the directions on the package and cook them.

When I make oatmeal, I like to add raisins or dried cranberries to them while cooking, thus eliminating the need for other sweeteners.  The benefits of these little seeds includes that they are quick cooking and high in fiber, very easy to assimilate and packed full of B vitamins, rich in folate and magnesium and is supposed to have the best amino acid profile of all grains.

Summer 2013 011


Cyn’s Organic Red Quinoa Breakfast

1-1/4 cups water, brought to a boil

1 cup Eden’s Organic Red Quinoa

1-1/2 tsp pure vanilla extract

1-2 pitted dates chopped small

1 tbsp Grandma’s unsulfured molasses (optional)

1 tsp Celtic Gray Sea Salt

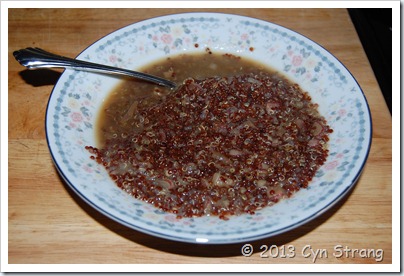
Wash the quinoa several times in cold water and add to the salted boiling water.  Add vanilla, chopped dates and/or molasses. Cover, reduce heat and simmer for 15 minutes.  Set for 5 minutes.

Stir and serve!

Summer 2013 013 

I left mine a little “juicy” and ate it as it.  What a wonderful, nutty flavor that filled me up and with my piece for fruit and a slice of whole grain toast, stayed full for another 5 hours.  I think that I will try it in a burger or a salad next!
Bon appétit!